
Most gardeners spend a fortune on nursery-grown rose bushes or expensive rooting kits, but what if the secret to a professional-grade rose garden was hiding in your pantry? There is an unconventional, “underground” method that expert hobbyists use to clone their favorite flowers using nothing more than a humble potato. If you want to turn a single rose stem into a flourishing bush without the high price tag, this bizarre potato trick is the game-changer you’ve been looking for.

Why a Potato? The Science of the “Spud Shield”
It sounds strange, but the potato acts as a high-tech incubator for a delicate rose cutting. It provides two things a baby rose needs most:
-
Constant Hydration: Potatoes are mostly water, keeping the stem moist in dry soil.
-
Nutrient Boost: As the potato slowly breaks down, it releases starch and nutrients directly to the developing roots.
Essential Materials for Your “Potato Roses”
-
Healthy rose stems (6–8 inches long)
-
Large red or white potatoes
-
Clean pruning shears
-
Rooting hormone (the “growth fuel”)
-
A drill or screwdriver
-
Glass jars or a 5-gallon pot (for the “mini-greenhouse” effect)
-
The Step-by-Step “Potato Protocol”
Step 1: Prepare the “DNA”
Select the most vibrant, healthy stems from a rose bush. Cut them into 6–8 inch segments and strip away the leaves from the bottom half.
-
Pro Tip: Keep your cuttings in a jar of water immediately after cutting to keep them “alive” while you prep their potato homes.
Step 2: The Precision Cut & Hormone Boost
Trim about half an inch off the bottom of the stem at an angle. Gently scratch or “score” the outer skin near the base of the stem—this exposes the inner layer where roots grow fastest. Dip this prepared end into your rooting hormone to supercharge the process.
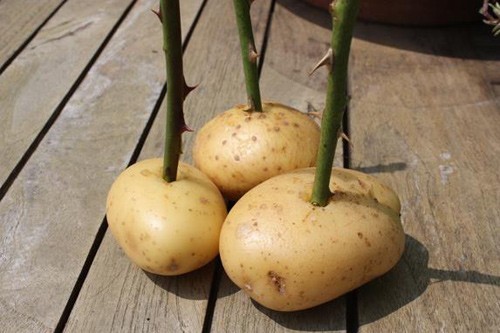
Step 3: Inserting into the “Incubator”
Use a drill bit or screwdriver to create a hole in the center of your potato. The hole should be slightly smaller than the rose stem for a snug fit. Insert the rose cutting into the potato, but be careful not to push it all the way through!
Step 4: The Underground Burial
Dig a hole in your garden or a large pot and bury the potato at least 3 inches deep. The potato should be completely covered by soil.
-
The “Jar Trick”: Place a glass jar over the exposed stem. This creates a humid, warm micro-climate (a mini-greenhouse) that protects the cutting from the elements while it works on growing roots.
Maintenance and Results
Keep the soil consistently damp. Within about one month, your rose will have established its own root system, independent of the potato. Once you see new leaf growth, you’ll know the “potato hack” was a success!

Pros and Cons of the Method
The Upside:
-
Zero Cost: It’s incredibly cheap compared to buying new plants.
-
Survival Rate: Great for dry climates where cuttings usually dry out too fast.
-
Natural Feeding: The potato provides a “slow-release” fertilizer for the infant roots.
The Downside:
-
Nature Happens: Occasionally, the potato might rot before the rose takes root, or it might try to grow its own leaves!
-
Creatures: The buried potato might attract curious garden critters looking for a snack.
Conclusion The potato method is a fascinating blend of kitchen science and backyard magic. It’s an easy, budget-friendly way to fill your yard with the fragrance of fresh roses.
Know someone who loves gardening but hates the cost? Share this bizarre potato secret with them today!


")